

esta en Ingles en proceso de traduccion , aqui dejo proceso fuente
STEP 1
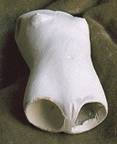
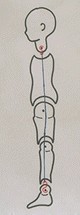
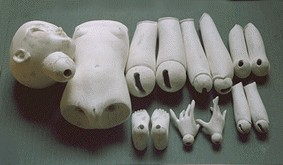
![[3.8KB]](http://www2d.biglobe.ne.jp/%7Edhnoah/imagegif/fig02.gif) Fig.02 | (1) Drawing up a planFor a start, draw up a plan in same size, the front and the side, takingaccount of the balance of each part, and the size of joints(Fig.02). This doll will be 2 feet tall. (2) Making the coreHere we don't use a mold. We introduce the way of using Styrofoam(foam polystyrene) for the core.Cut the all parts from the lump of Styrofoam in a size 10mm smaller than finished size.(03) If you can find Styrofoam balls in adequate size on the market, you may use them for joints. |
![[2.9KB]](http://www2d.biglobe.ne.jp/%7Edhnoah/imagejpg/imgd15p.jpg) 03 |
![[8.5KB]](http://www2d.biglobe.ne.jp/%7Edhnoah/imagejpg/imgd12p.jpg) 04 | The left (04), all the parts are arranged except hands and feet, which don't need the core.The neck will be made after the shape of the head is settled and then attached to the head. Put marks the position of features in the face, and the top and bottom, right and left in the limbs. (05) |
![[2.4KB]](http://www2d.biglobe.ne.jp/%7Edhnoah/imagejpg/imgd14p.jpg) 05 |
The Base
![[3.9KB]](http://www2d.biglobe.ne.jp/%7Edhnoah/imagejpg/imgd13p.jpg) 05 | The base is made with sawdust mixed with paste. Mixed sawdust turns into hard and light after it is dried up. The styrofoam core is to be raked out later, then every parts will be hollow. There are two types of sawdust. One is rough which is used for the foundation, and the other is powdery used for the surface. This time the rough one is not available, so the powdery one is used for the foundation as well as the surface.(05) | |
![[4.5KB]](http://www2d.biglobe.ne.jp/%7Edhnoah/imagejpg/imgd08p.jpg) 06 | Mix the same quantity of sawdust and CMC (chemical paste mixed with water. If CMC is not available, starchy paste can be used) and knead with hand until it becomes clayey.(06)Don't make too much, since it will get dry or rotten after a few days. | |
![[3.1KB]](http://www2d.biglobe.ne.jp/%7Edhnoah/imagejpg/imgd10p.jpg) 07 | Make it into a lump (07) and wrap it to prevent from drying. | |
![[3.9KB]](http://www2d.biglobe.ne.jp/%7Edhnoah/imagejpg/imgd09p.jpg) 08 | Put the mixed sawdust on the surface of styrofoam with bonding agent.(08) Put all over the surface except the joints parts in about 2mm thick uniformly, then dry them up.If somewhere fissures, then fill it up and dry again perfectly. | |
![[3.5KB]](http://www2d.biglobe.ne.jp/%7Edhnoah/imagejpg/imgd41p.jpg) 09 | Sawdust has put all over.(09)Put the mark of up and down, right and left at the surface of joints.(10) | ![[2.4KB]](http://www2d.biglobe.ne.jp/%7Edhnoah/imagejpg/imgd40p.jpg) 10 |
![[2.7KB]](http://www2d.biglobe.ne.jp/%7Edhnoah/imagejpg/imgd39p.jpg) 11 | ModelingKnead the same quantities of sawdust and stoneclay.(12)
For the first put the mixed base uniformly, and put the mark for modeling.(11) Don't use fiber-tipped pens, because ink would influence the surface later. Colored pencils or conté crayons are suitable. | |
![[5.2KB]](http://www2d.biglobe.ne.jp/%7Edhnoah/imagejpg/imgd25p.jpg) 13 | ![[2.1KB]](http://www2d.biglobe.ne.jp/%7Edhnoah/imagejpg/imgd28p.jpg) 14 (13) & (14) show the state of being fleshed out roughly.After the shape of the head has decided, make the neck by the same way of the other parts. (Use the styrofoam inside for the core.) |
![[2.1KB]](http://www2d.biglobe.ne.jp/%7Edhnoah/imagejpg/imgd29p.jpg)
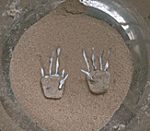
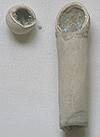
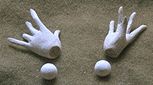
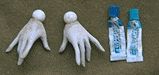
![[2.8KB]](http://www2d.biglobe.ne.jp/%7Edhnoah/imagejpg/imgd23p.jpg) 15 | The base of handsDraw the picture of a hand, and make palms withsawdust. Cut stainless steel into ten pieces for fingers.(15) | |
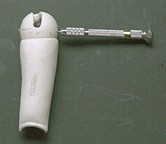
![[2.0KB]](http://www2d.biglobe.ne.jp/%7Edhnoah/imagejpg/imgd24p.jpg) 16 | Make holes for fingers, four on the top of the palm and one inside the palm with a pinvise (tiny drill:16). | |
![[2.7KB]](http://www2d.biglobe.ne.jp/%7Edhnoah/imagejpg/imgd21p.jpg) 17 |
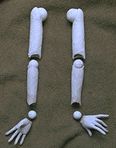
Put epoxy resin (18) at the top of steels and fix into the holes.(17) | |
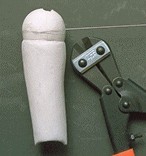
![[1.8KB]](http://www2d.biglobe.ne.jp/%7Edhnoah/imagejpg/imgd20p.jpg) 19 | After fixed firmly, cut the steels into adequate length and bend them into favorite pose.(19) |
![[1.5KB]](http://www2d.biglobe.ne.jp/%7Edhnoah/imagejpg/imgd22p.jpg)
Setting eyes
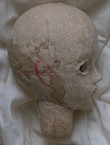
 20 | œCut the head open and rake the styrofoam.(20)œMake the eyeholes with a chisel.(21) | ![[2.0KB]](http://www2d.biglobe.ne.jp/%7Edhnoah/imagejpg/imge63.jpg) 21 |
![[2.0KB]](http://www2d.biglobe.ne.jp/%7Edhnoah/imagejpg/imge61.jpg) 22 | œGlass eyes. Noah dolls use rather big eys. You may prepare some sets in diffirent size and choose your favorite size. (22) | |
![[2.7KB]](http://www2d.biglobe.ne.jp/%7Edhnoah/imagejpg/imge60.jpg) 23 | ![[1.5KB]](http://www2d.biglobe.ne.jp/%7Edhnoah/imagejpg/imge59.jpg) 24 | œFix the eyes with stoneclay mixed with bonding agent. (23j(24) |
![[2.7KB]](http://www2d.biglobe.ne.jp/%7Edhnoah/imagejpg/imge58.jpg) 25 | ![[1.5KB]](http://www2d.biglobe.ne.jp/%7Edhnoah/imagejpg/imge57.jpg) 26 | œClose the head with sawdust and stoneclay mixed with bonding agent. (25j(26) |
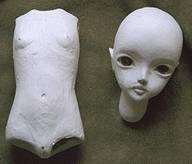
Head and body
 27 | œMake the detail around the eyes and other parts of the feature. After the face has been finished, file the surface smooth with rough sand pepars.(27) |
 28 | œDraw the outline of ears and make the external ears with sawdust and stoneclay.(28)œMake armholes, legholes and neckhole in the torso and rake the styrofoam core. Model it further, and file smooth.(29) | 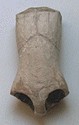 29 |
![[2.7KB]](http://www2d.biglobe.ne.jp/%7Edhnoah/imagejpg/imge52.jpg) 30 | ![[2.7KB]](http://www2d.biglobe.ne.jp/%7Edhnoah/imagejpg/imge51.jpg) 31 | œPut the head into the neckhole in the body and see the balance of them. Now you can see the hip is too small for the head. (30j(31) |
![[2.0KB]](http://www2d.biglobe.ne.jp/%7Edhnoah/imagejpg/imge82.jpg) 32 | œDraw measure on the surface to check the symmetry and irregulariies.(32) |
![[2.7KB]](http://www2d.biglobe.ne.jp/%7Edhnoah/imagejpg/imge75.jpg) 33 | ![[2.7KB]](http://www2d.biglobe.ne.jp/%7Edhnoah/imagejpg/imge74.jpg) 34 | œMake the detail and file the whole more.(33j(34) |
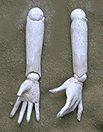
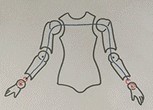
Arms
 Prepare some rough sawdust in a bowl. Put bonding agent on wire fingers, then put it in the bowl and dust fingers with sawdust. 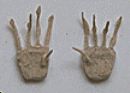 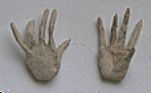 After dried up, model details with sawdust mixed with stoneclay. |
 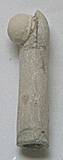  Cut arms at elbows. Put joint balls which cut off the joint parts into shoulder holes. Put joint balls into arm holes at the elbows then fix the details. |
File all the parts with sandpapers, then put stoneclay all over, and
make the surface smooth.
Check the balance of each parts.
Carve wrist holes and put joint balls with epoxy resin.
Cut the joint parts at the direction which other parts should be bend
smoothly.
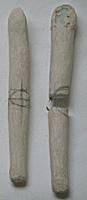
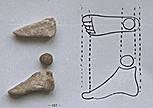
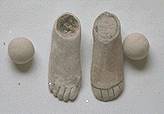
Legs
  Draw a plan and make cores with sawdust. Model details with sawdust mixed with stoneclay. Carve ancle holes and fix joint balls with epoxy resin. 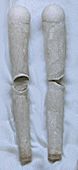 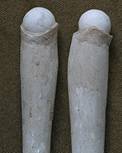 Fix joint balls on the top of thighs and check the balance. Here the parts under the knees seem short, so remake them a little longer. Put joint balls into the knee holes and fix then. 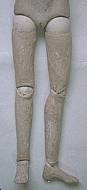 Check tne balance of every parts. File the surface with sandpapers, put stoneclay allover, and make the surface smooth. |
Joint Caps
Put stoneclay on the head and the body, and make the surface smooth.
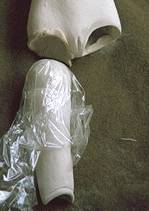
Make caps in all the joint holes.
Put stoneclay on a hole, and press a joint ball wrapped in plastic wrap.
Remove excess stoneclay around the hole and fix the cap.
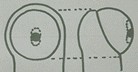
Joint Holes
  Drill holes in joints. In both legs,loops of elastic run from the ancle up through the knee hole and the leg hole andup to the head both loops being hung on a hook inside the neck. For the arms, the elastic loop is attached to a hook inside one wrist, then thread through elbow and shoulder hole and out through the oppsite one and attached to a hook inside the opposite wrist. |

Drill three holes in elbow, knee, and leg joints and cut long.(photo
left)
Drill a hole in the center of neck, wrist, and ankle joints.(center)
For shoulder joints dril holes in the center and cut up and down.
(left)
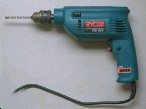
Erectric drill.
Thread Piano wires
  Drill holes in neck, elbow, elbow, wrist, leg, knee and ankle joints with a pindrill. Tread piano wires inside the joints through the hole and cut with nippers. Fix the end of the wire with stoneclay. |
All parts are prepared.
Temporary Jointing
| Now joint all the parts temporarily to check and see the balance. The length and strength of the elastic loops depend on dolls. For legs, cut two pieces of elastic measuring from ankle to neck hole. For arms, cut a piece of elastic measuring from wrist to wrist. | 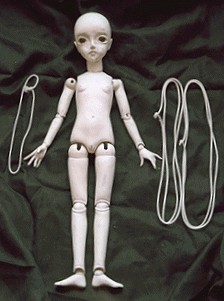 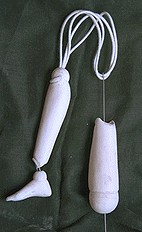 |
| Tie up the end of the elastics together to form loops. Using a strong piece of wire with a bent, draw the elastic loops through each parts, and attach to the hooks at each end. Fix all the parts and check all the joints to see if they can be moved smoothly. The elastics must not be too slack at the same time. | 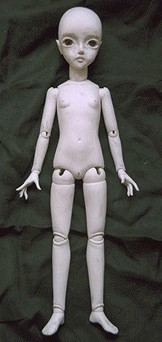 |
Coating Foundation
| Noah Doll use "gohun", the ground shell powder used for Japanese traditional dolls, to coat as foundation. Modeling paste (available at drawing materials shop) can be used in place of it. Dilute some amount of modeling paste with the same amount of water. | 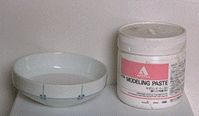 |
Put paste on the surface of all parts with a brush carefully, don't rub the surface. Finish all parts, then dry up, and do it 3 or 4 times. | 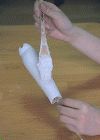 |
| Here a lump of styrofoam is used for stand. A heavy wood plank or anything can be used. |  |
| Finish the paste coating. After dry up, smooth all the surface with sand papers perfectly. Curve the features out with a cutter and fix the details. | 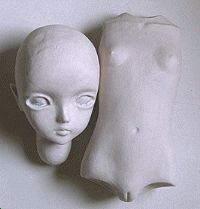 |
No hay comentarios:
Publicar un comentario